
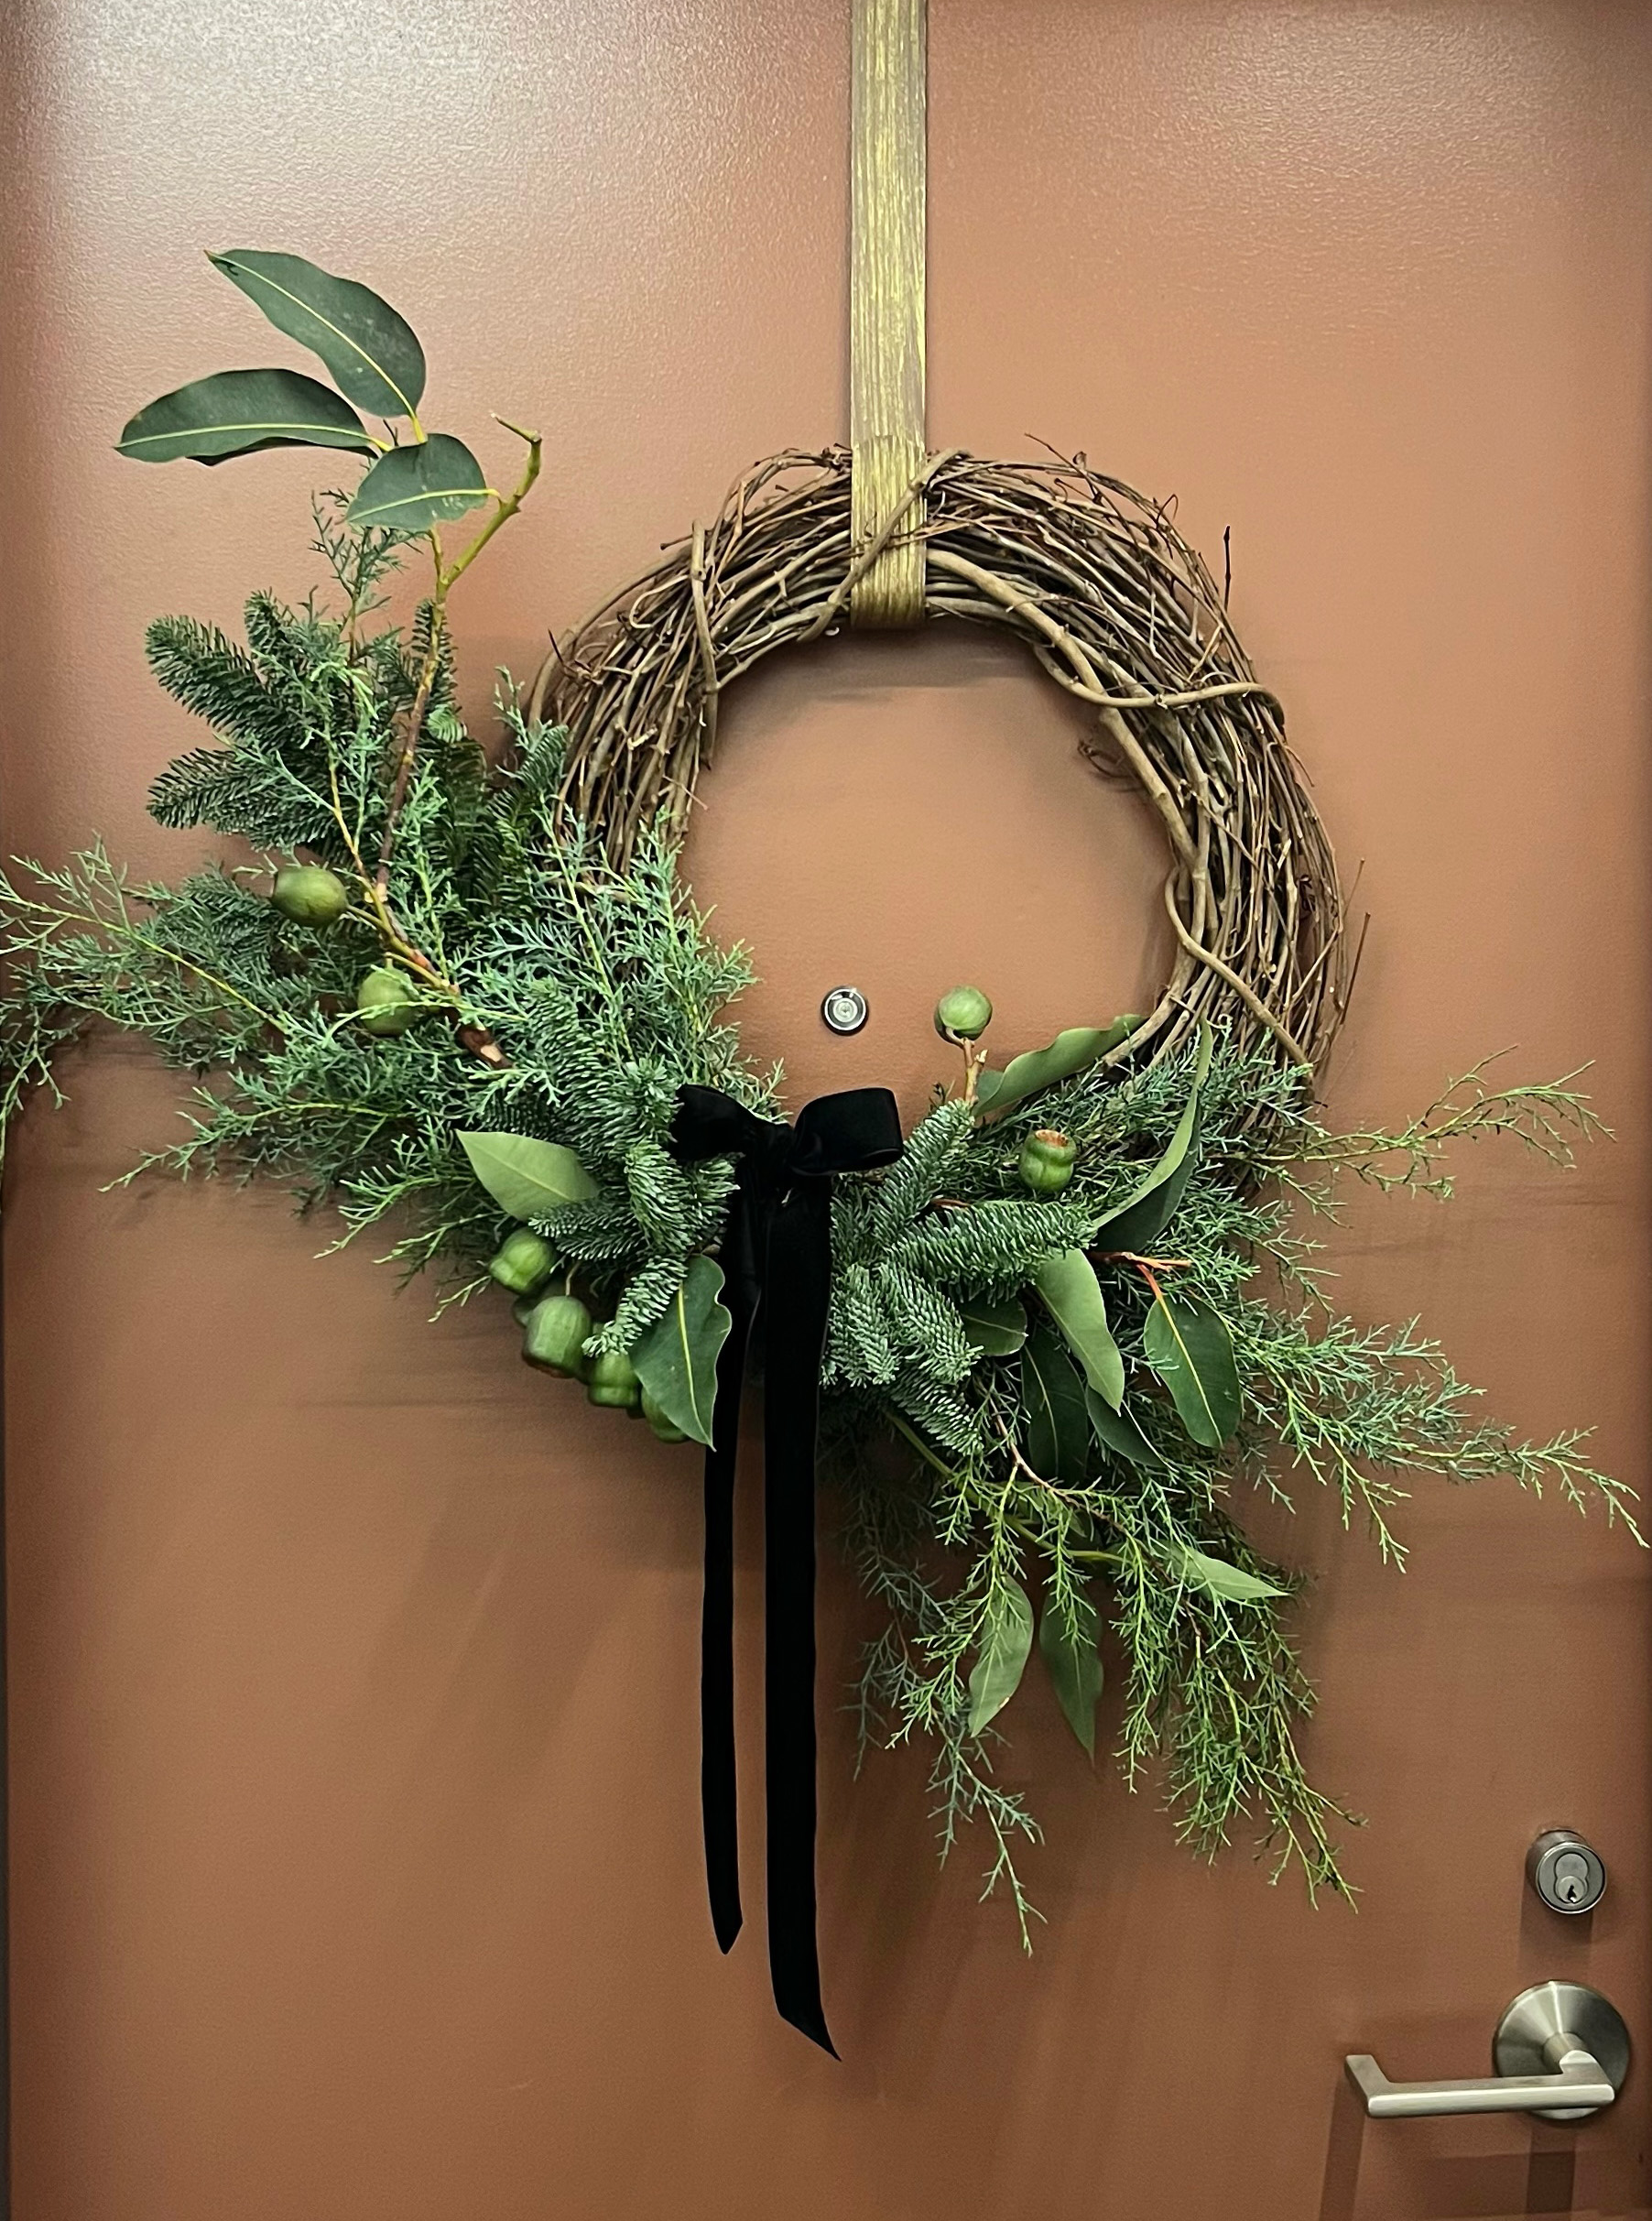
Tis the season of holiday decor. While I love the magic and romanticism of Christmas, my style is very specific. I embrace deep moody tones, light, and texture which was my inspiration for creating this Whimsical Christmas Wreath.
Grapevine Wreaths
Designing on a grapevine wreath gives the design a woodsy element and creates a beautiful juxtaposition when dressed up. It can also be reused every season. For example, in the spring you may want to use Protea, or a dried moss wreath for your fall design.
Branches
Layer Branches that vary in length, fullness, texture, and are 3 dimensional (such as the eucalyptus pods). I created an asymmetrical design with the greenery to attract the eye and to feel natural. Be sure to measure the width of your door, then use painters tape to help you design within the space.
Embellishments
I used velvet ribbon because I wanted to add a nice contrast of texture and for the Christmas wreath to feel festive yet sleek. I used black ribbon because I wanted it to feel modern and non-traditional. You can play around with other types of ribbon such as silk or chiffon.
Here’s what I did to achieve this whimsical Christmas wreath.
Materials:

- Blue Cedar Branches
- 18′ Grapevine Wreath
- Branch Scissors
- Eucalyptus Pods
- Green Wire
- Brown Wire
- Fraser Fir Branches
- 1 1/2′ Black Velvet Ribbon
Directions:
- Measure the width of your door, then use painters tape to mark the measurements on your design surface to ensure you design within the perimeters.
- Tightly wrap green wire around the wreath 5-6 times. This will serve as the foundation to attaching the variety of greenery. Each time you wrap the wreath with wire, be to wrap within the thickness of the ribbon
- Begin adding the lengthy branches first to define the shape. Trim the branches when necessary to create your desired shape. Pay attention to natural curves within the branches and use them to create movement and playfulness. Maybe all of the branches with similar curves are placed in the same direction or they are opposing each other. Once you’ve defined your shape, wrap green wire around the branches to secure them in place.
- Layer branches that add fullness and fill in empty spaces, gaps, and to hide large sticks. Wrap wire to secure the branches in place.
- Layer branches that have 3 dimensional form and unique detail, such as berries, pods, etc. Wrap wire to secure the branches in place.
- Cut a piece of ribbon and tie it around the wreath to cover up the wire, then let it hang or tie a bow. Cut the ends of your ribbon horizontal for a more rustic look, or cut the ribbon on a bias for a more refined look.
- Hang the wreath. Place a wreath hanger on your door, hammer a nail, or place an adhesive hook on your door to hang the wreath.

Get creative and have fun designing your wreath!